Created :
Written by Support InfoBridge
Overview:
Please follow this article if you need to set the Access Rights on Exchange 2000 / 2003 when using the Exchange Synchronizer V2.
How to:
The newly created domain Sync User is being used to access the Exchange folders for the synchronization users. There are 3 methods to set the correct access rights for the new created domain user.
Method 1 is the recommended method to use, when using this method no further actions are required when new Exchange users are added.
Method 2 can be used when it's not possible to add the newly created user to the mail store of Exchange. This means that the newly created domain user has to be manually given access rights for each individual synchronization user. When a new Exchange user will be added, the new domain user needs to be added to this account manually.
Method 3 can be used when the users themselves should control if the newly created domain user, for example syncuser, has access rights to their Exchange account.
Method 1 (Recommended)
Give the newly created user Full Access Rights to the Exchange Mail Store.
Please follow the steps as described below.
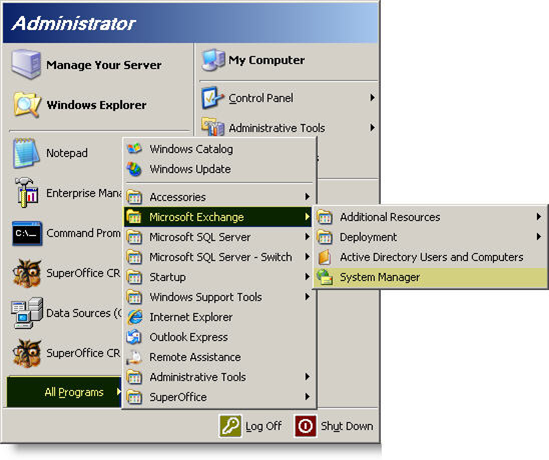
- Go to Start
- Click All Programs
- Click Microsoft Exchange
- Click System Manager
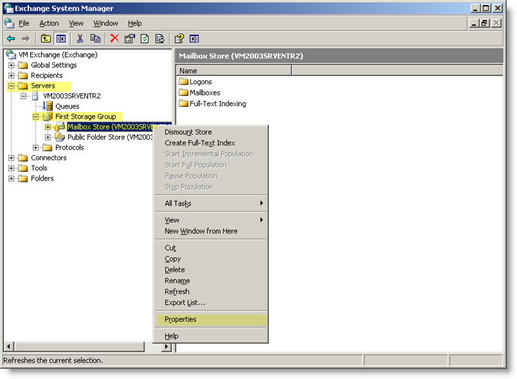
- Expand Servers
- Expand First Storage group
- Right-click Mailbox Store
- Click Properties
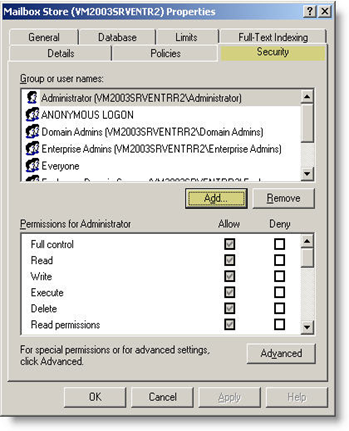
- On the Security tab, click Add
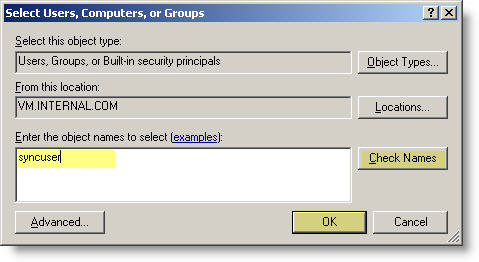
- Type the name of the newly created domain user (for example syncuser)
- Click Check Names
- If the name is correctly resolved, click OK
- Select the added user
- Check all the options under Allow
- Use the scroll bar on the right to also set the remaining options
- Click OK
Method 2
Give the newly created domain user access rights to each individual synchronization user.
Please follow the steps as described below.
- Go to Start
- Click Administrative Tools
- Click Active Directory Users and Computers
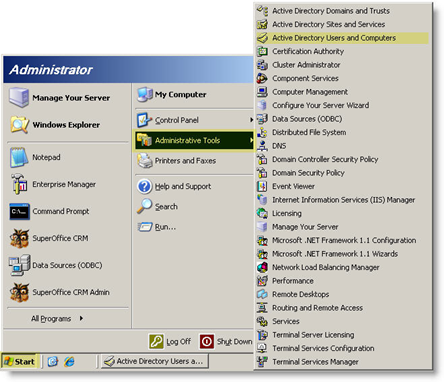
- Click Users
- Right-click the User where you want to give access rights to the newly created domain user
- Click Properties
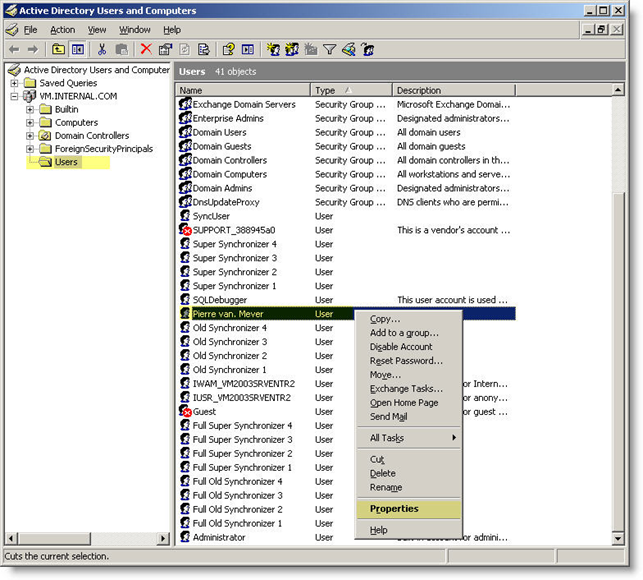
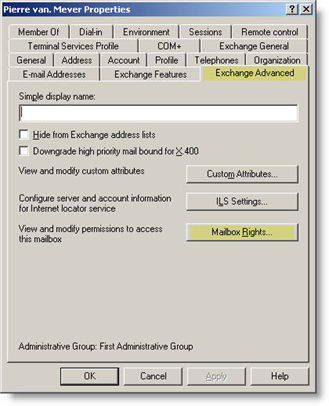
- On the Exchange Advanced tab, click Mailbox Rights
- Click Add
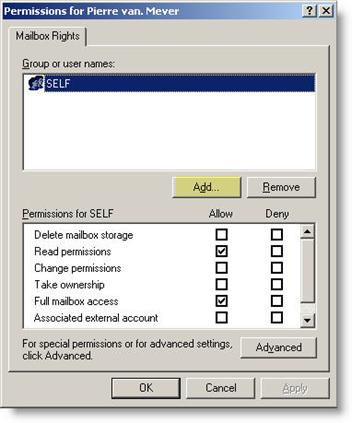
- Type the name of the newly created domain user (for example syncuser)
- Click Check Names
- If the name is correctly resolved, click OK

- Select the added user, and check all the options under Allow
- Repeat step 2 through 6 for each synchronization user
Method 3
Setting the access rights controlled by the Outlook User.
At larger companies setting the access rights using method 1 or 2 could be impossible due security regulations. It is also possible to let the Outlook user decide if his/her account should be synchronized.
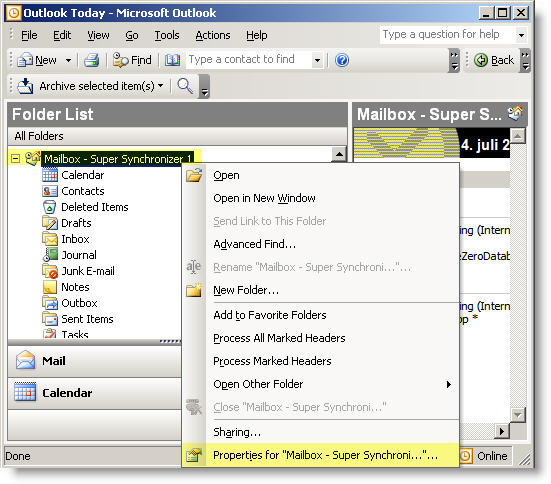
- Open Microsft Outlook
- Right-click on the root of the mailbox store
- Click Properties for “Mailbox…."
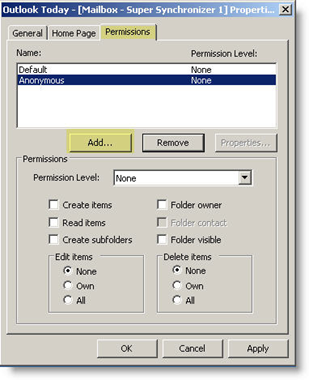
- On the Permissions tab, click Add
- Select the name of the newly created domain user which serves as the synchronization user
- Click OK
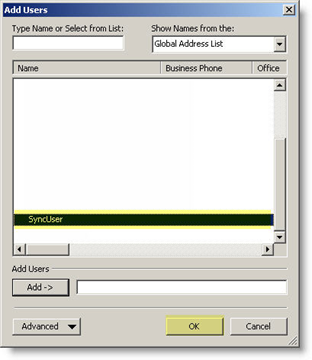
Note: If the special domain user is not visible, set the dropdown list "Show Names from the:" to Global Address list.
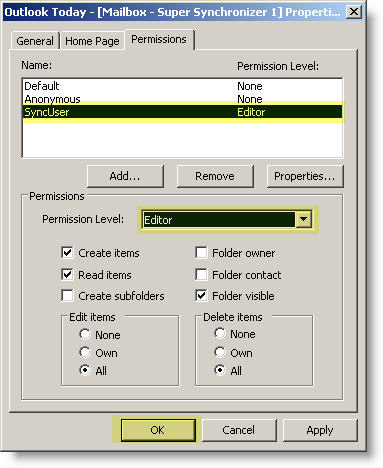
- Select the newly added user
- Set the Permission Level to Editor
- Click OK
- Select the Tools menu option from the menu bar
- Click Options
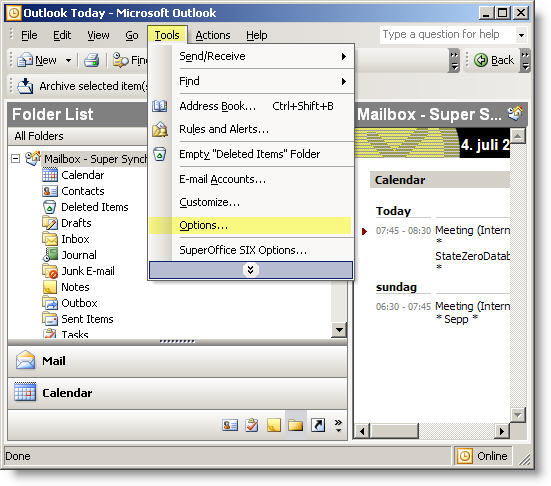
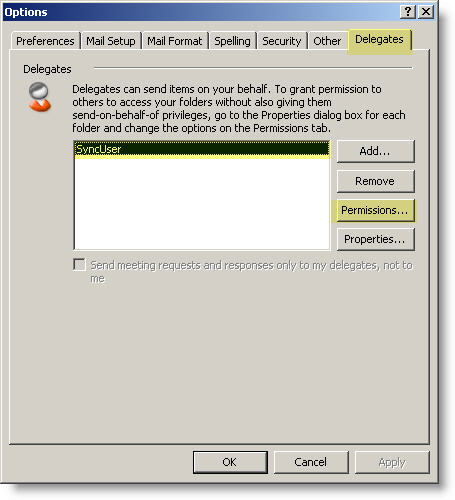
- On the Delegate tab, select the name of the user which was added in step 4
- Click Permissions
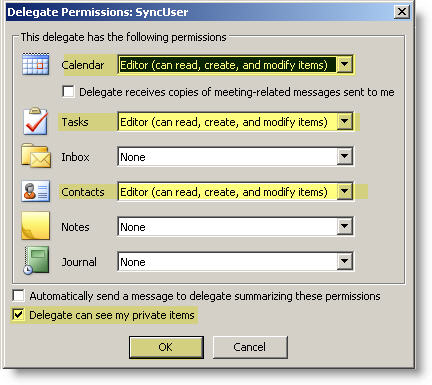
- Set the Calendar, Tasks and Contacts option to Editor (can read, create and modify items)
- Also check the option Delegate can see my private items
- Click OK
- Click OK once more to close the previous screen
Note: The above steps needs to be repeated for all Outlook users, if method 1 or 2 is not being used to set the access rights.