Created :
Written by Support InfoBridge
Overview:
Follow this article if you need to configure the Hosted Exchange Server for use with the Visma Exchange (EWS) Synchronizer using Impersonation.
How to:
- Go to the hosted Exchange Server and login.
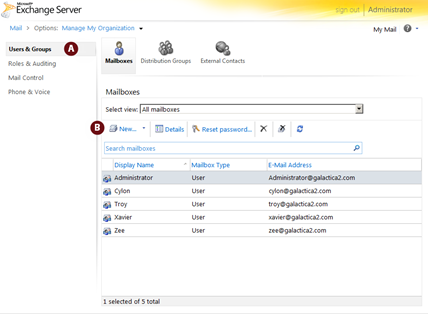
- A - Users & Groups: The ‘Users & Groups’ menu choice is selected by default.
- B - New: create a new sync user (this will cost you one user license).
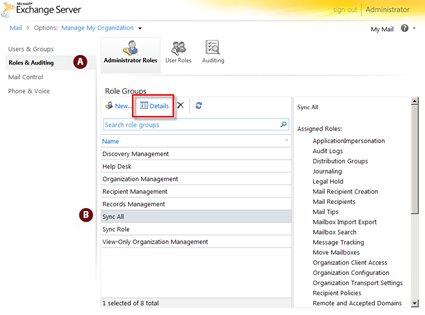
- A - Roles & Auditing: Select the ‘Roles & Auditing’ option; Check if the “Administrator Roles” tab is selected. The “Role Groups” list is shown and shows all the available role groups.
- B - Sync All: Select the ‘Sync All’ role and press ‘Details’.
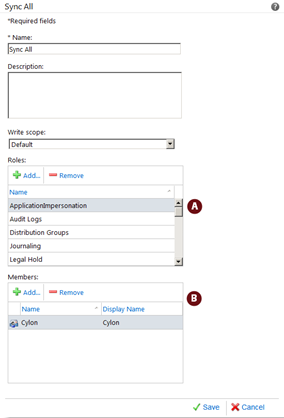
- A - Roles: Select ‘ApplicationImpersonation’ in the ‘Roles’ section . The “Role Groups” list is shown and shows all the available role groups.
- B - Add: In the members section press ‘Add…’.
- The ‘Select Members’ form is shown; Select the user that must be “Impersonated”.
- Press the ‘Add ->’ button to add the selected user; Press ‘OK’
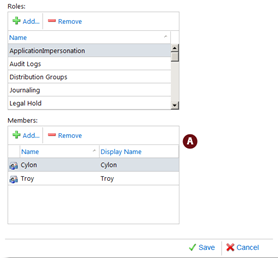
- A - As you can see the user is added to the “ApplicationImpersonation” role; Press the “Save” button to save your settings.
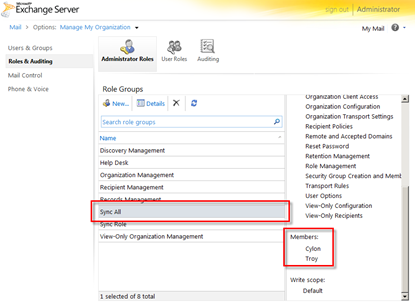
- When you scroll down and see the section “Members” you see the added user to the “Sync All” group.
