Created :
Written by Support InfoBridge
Overview:
There are two methods of preparing a calendar for switching from the Outlook Synchronizer to the Synchronizer for SuperOffice:
- For users that work mainly in the SuperOffice calendar, it’s easier to clean the Outlook calendar before starting the Synchronizer for SuperOffice
- For users that work mainly in the Outlook calendar, it better starts the synchronizer and cleanup the duplicates afterward. For this method, please see the following article: How to remove Duplicates from Outlook
How to:
Calendar cleanup for users that use SuperOffice as a primary calendar system
Don’t follow these steps if you use primary use Outlook for your appointments or if you have a lot of Outlook Meetings (with invited participants).
- Make sure that the Outlook Synchronizer is stopped and uninstalled
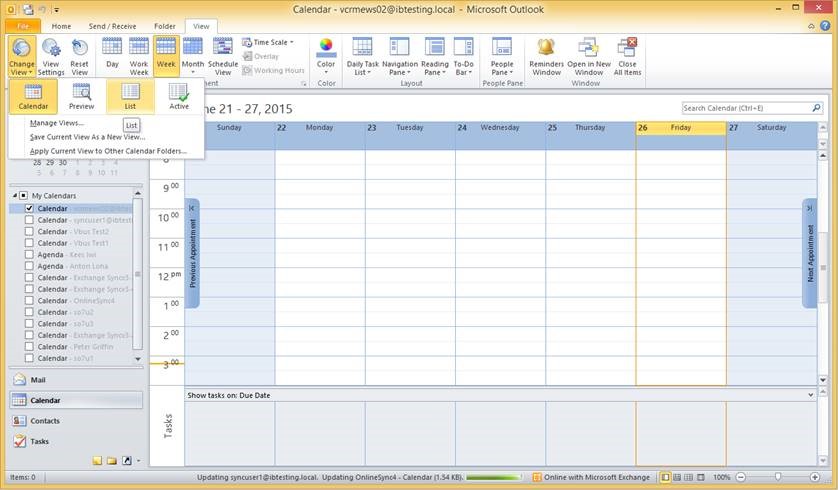
- Open Outlook and go to Calendar
- Then click on the tab ‘view’ select ‘Change view’ and choose ‘List’
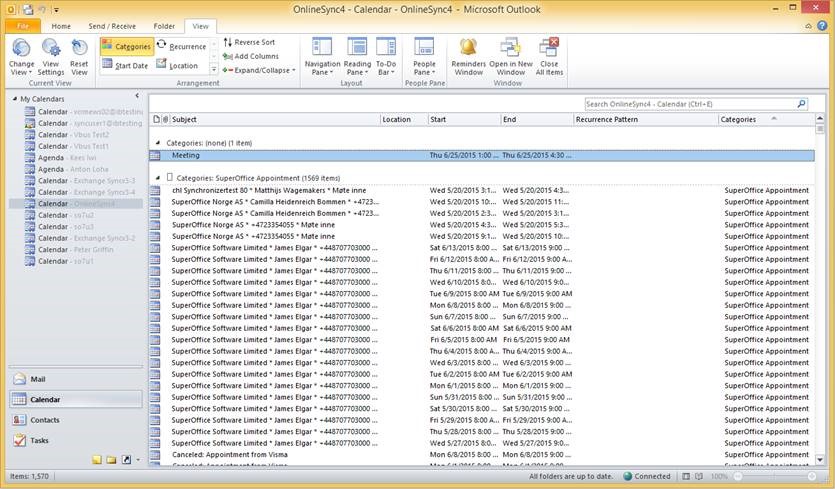
- Order the list by category
- Delete all appointments in category SuperOffice Appointment
- Follow the steps for Cleaning up Contacts (see below)
- Start using the Nebula Synchronizer
Cleaning up Tasks in Outlook
Cleaning tasks in Outlook works in the same way as with the calendar. The category to delete is called SuperOffice Task
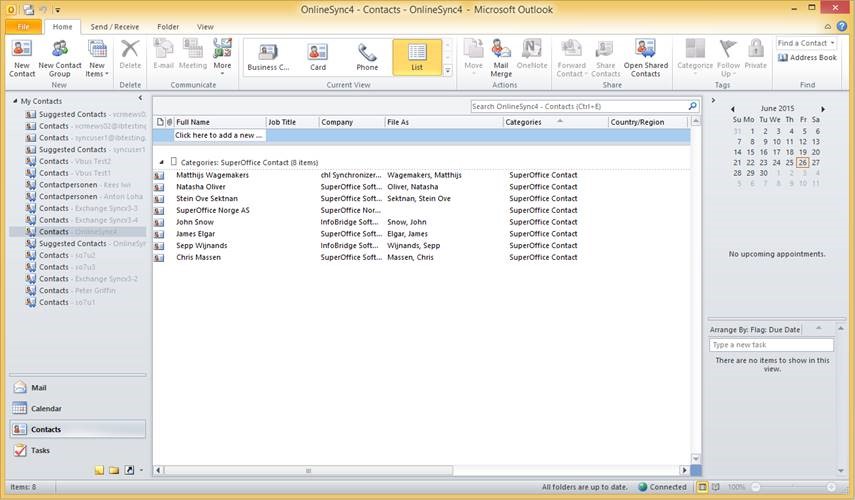
Cleaning up contacts in Outlook
Cleaning up contacts is easier, as contacts are synchronized only from SuperOffice to Outlook and not the other way around (One Way synchronization). Contacts can be cleaned up before starting the Nebula Synchronizer synchronization or after.
It’s no problem if contacts are deleted that are already synchronized by the Nebula Synchronizer: these will be automatically restored within 30 minutes.
- Open Outlook and go to contacts
- Then click on the tab ‘view’ select ‘Change view’ and choose ‘List’
- Order the list by category
- Delete all appointments in category SuperOffice Contact